Victron Solar EV charging on a budget
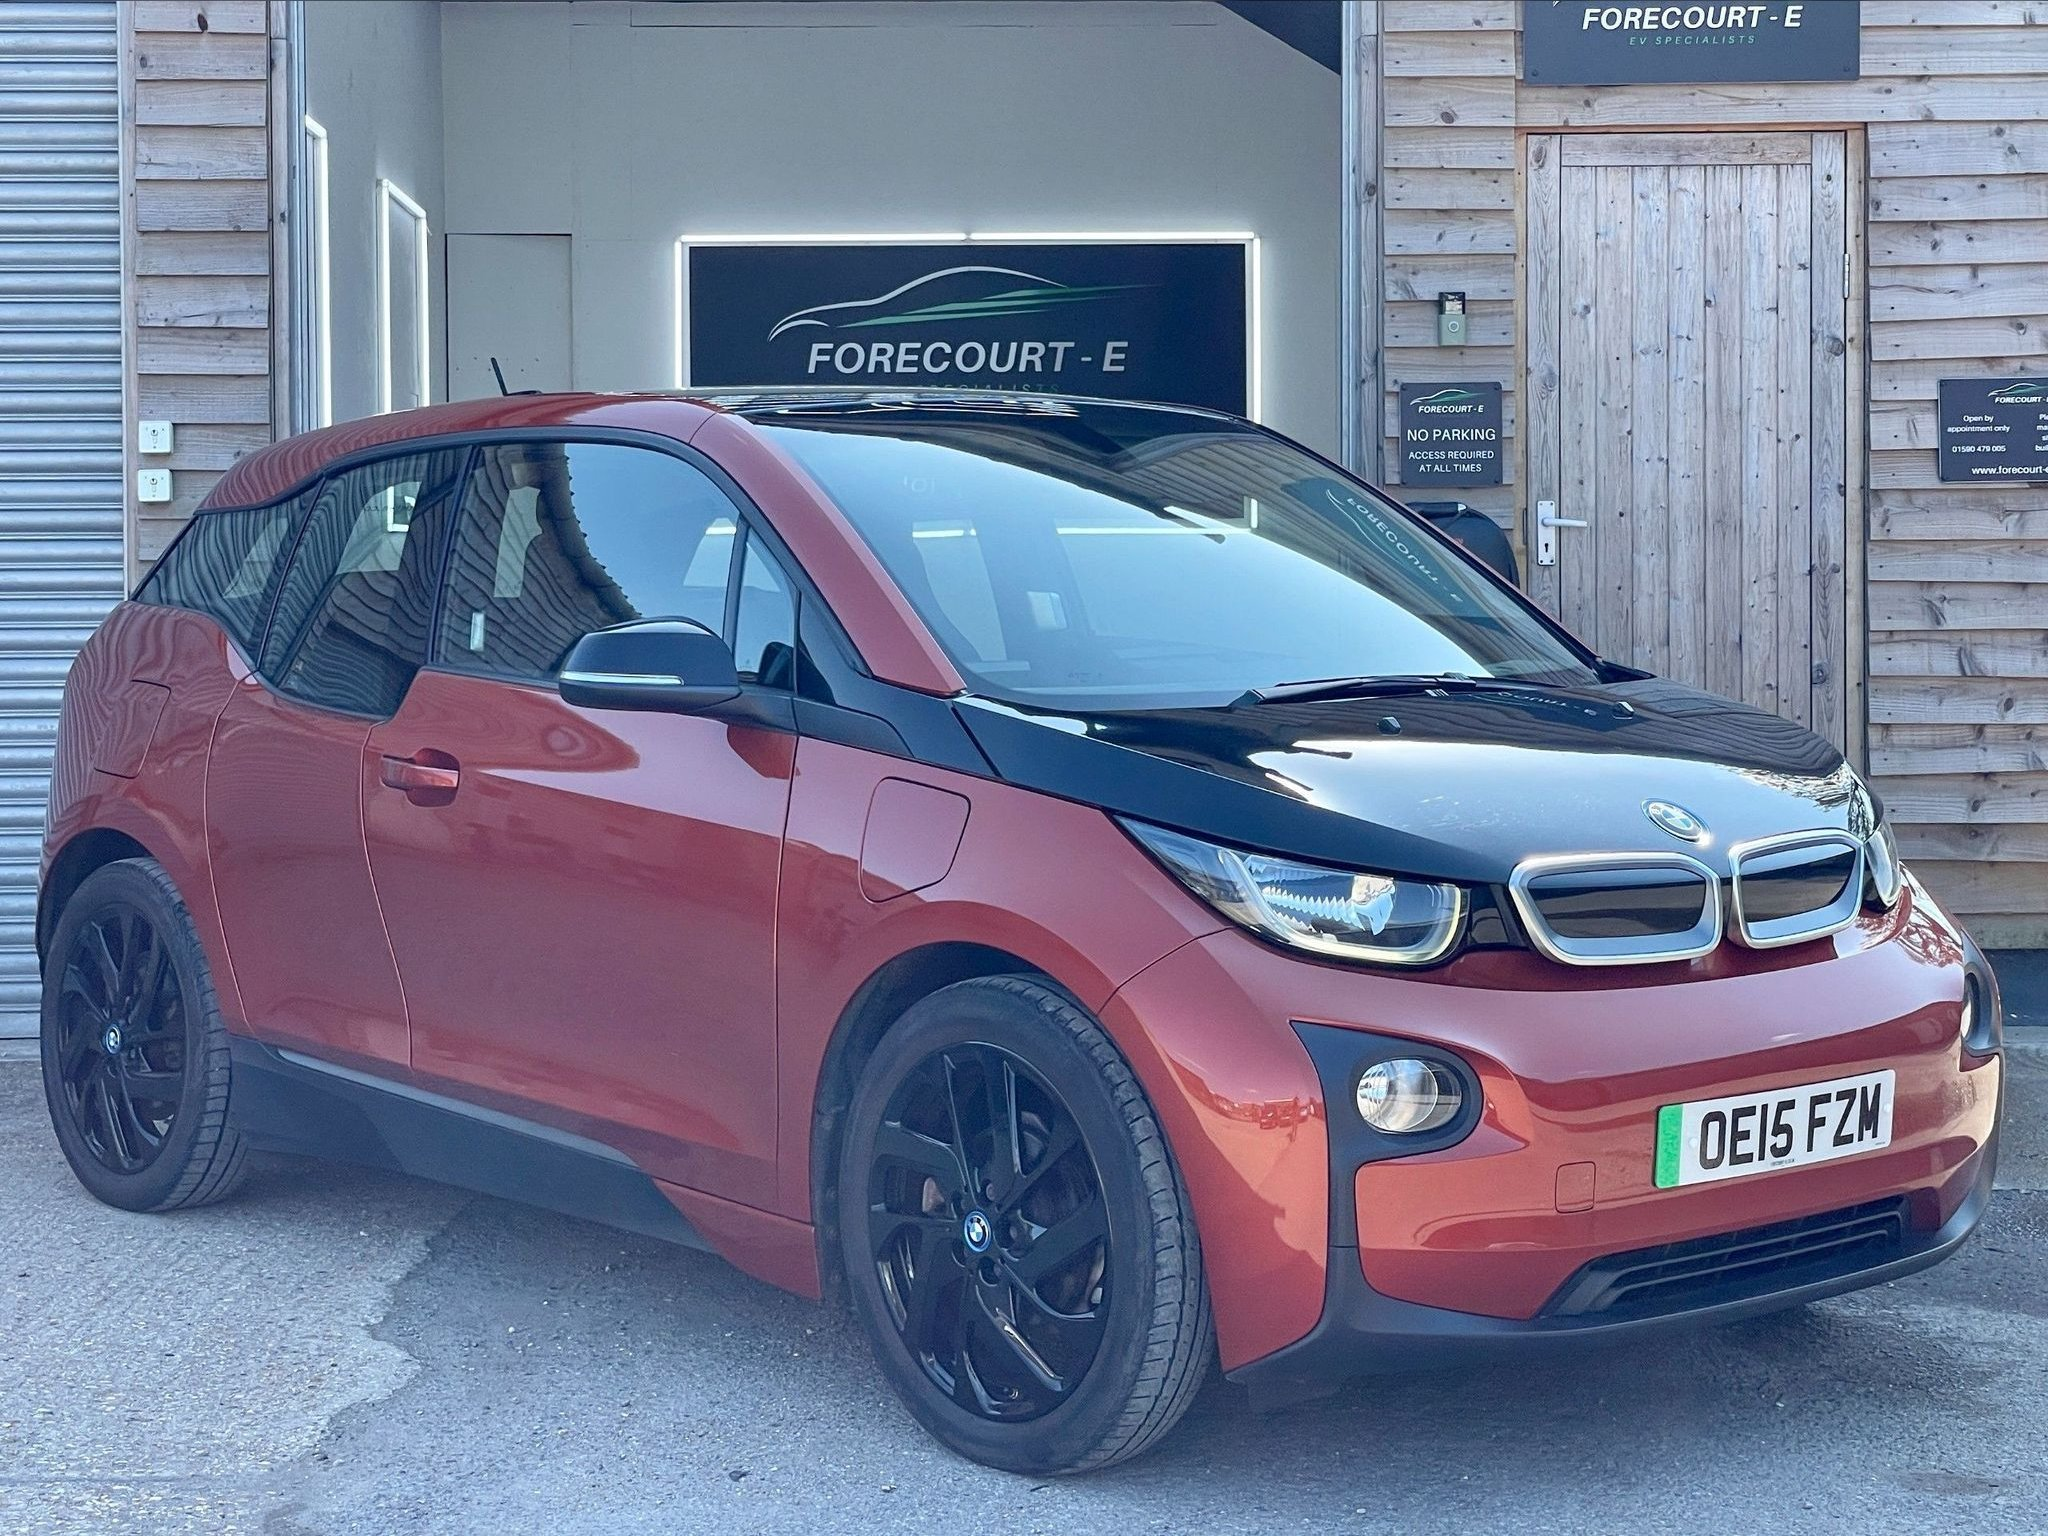
I recently got a lovely BMW i3 - its a 70 mile petrol + 70 mile electric range extender 2015 model.
I immediately started looking at 7kwh wall chargers but of course not all of these support excess solar charging. And because my system does not export power I was stuck for options that would utilise the energy my system creates and use it in a "smart" way.
(Victron does sell a model that does this but its about £1000!!)
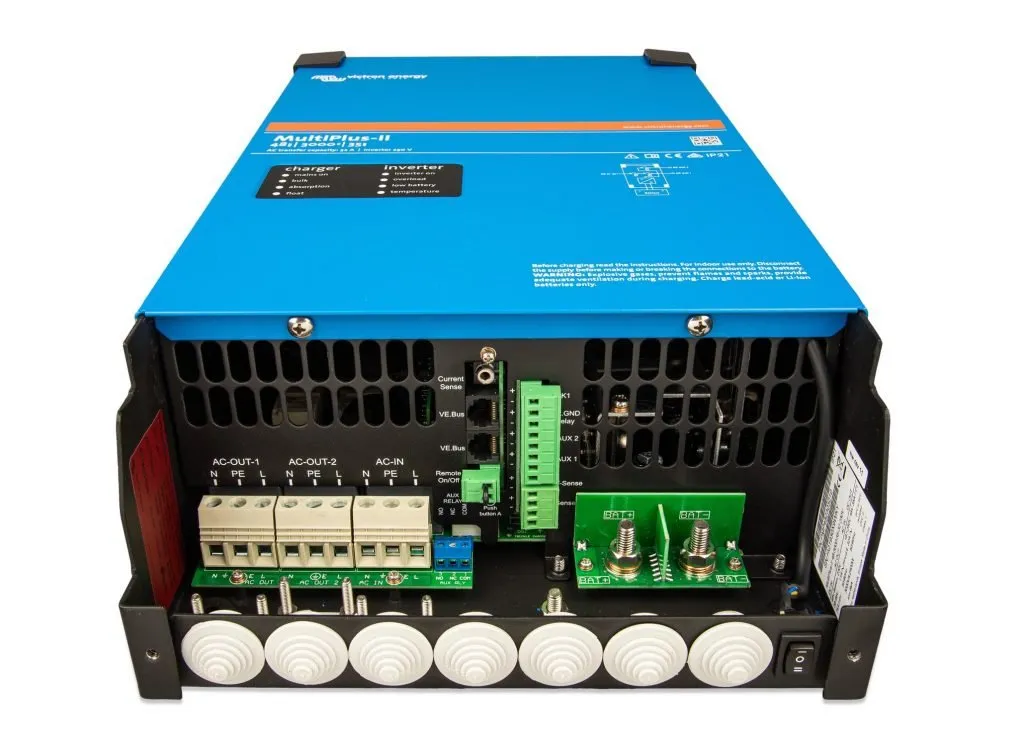
On top of this my Multiplus 2 inverter has a limited output which if I exceed I will be using grid energy to make up the shortfall (which is not really the plan here).
In addition to the maximum inverter output I have to consider that running the inverter flat out will cause it to heat up which according to the specs will further reduce the output.
- Cont. output power at 25°C 2400W
- Cont. output power at 40°C 2200W
- Cont. output power at 65°C 1700W
So this means I need an adjustable charger and I need to charge slowly for a longer period of time.
I would also benefit from using one of the independent outputs on the victron so that I can manage that output separately from the supply to the house.
Luckily the victron inverters have a programmable output for just this!
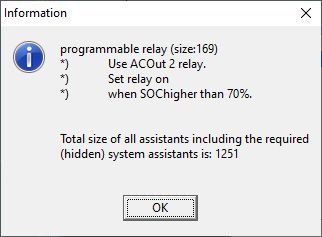
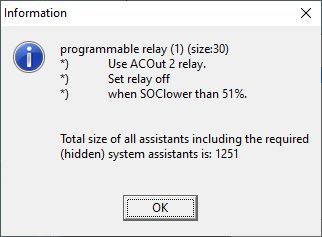
I then programmed the AC-OUT-2 to turn on based on the battery SOC being greater than 70% and to turn off when less than 50%.
This usually happens for me when we are approaching midday. The charger can then hold a charge rate via the inverter of 8 to 10 amps through to about 19:00 if there is sun all day during the UK summer.
Setting the Relay -
You can either use the mk3 adaptor if you have one or you can go to https://vrm.victronenergy.com/ and set your dataflow to real time.
Then head to your installation and then device list;
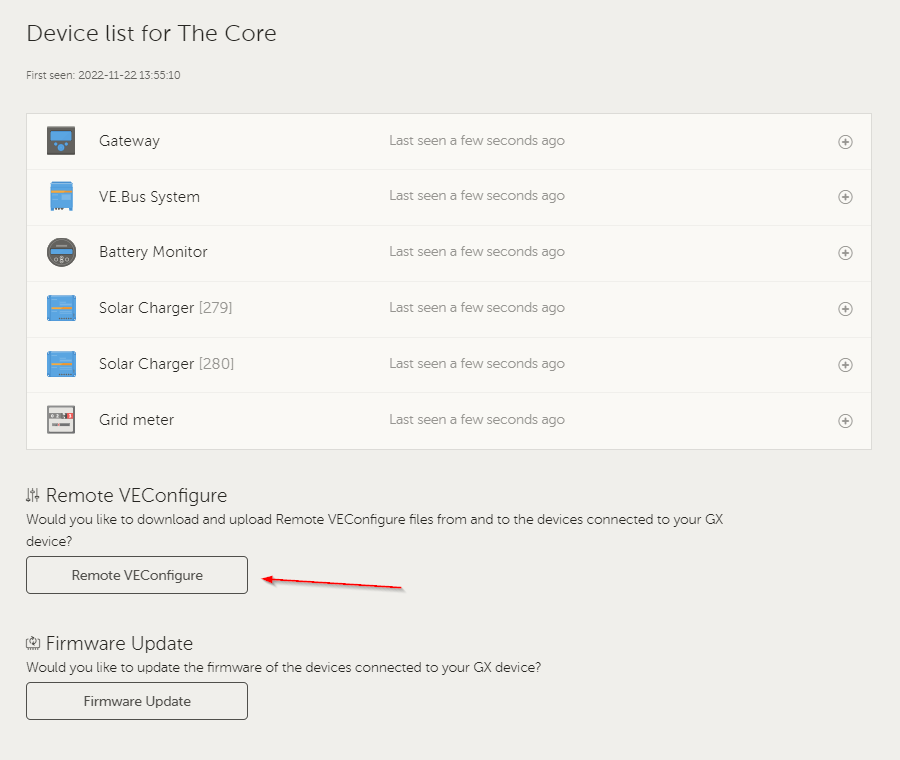
Then download VE Configuration Tools from https://www.victronenergy.com/support-and-downloads/software and open the file.
From here follow the below screen shots to create a relay 'on' and a relay 'off' scenario.
I have not covered the exact steps here but the UI is relatively easy to follow.
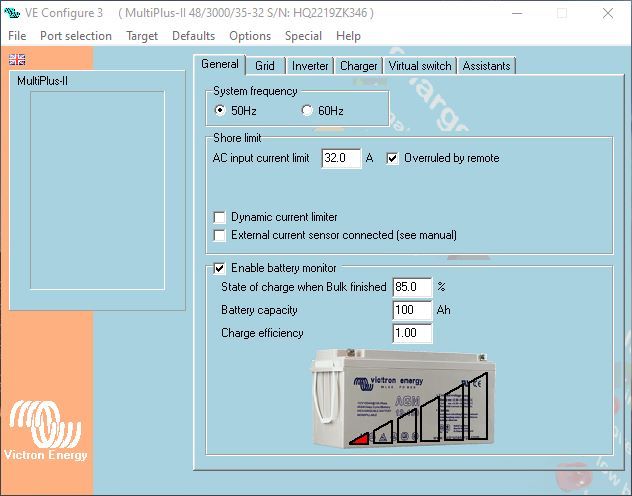
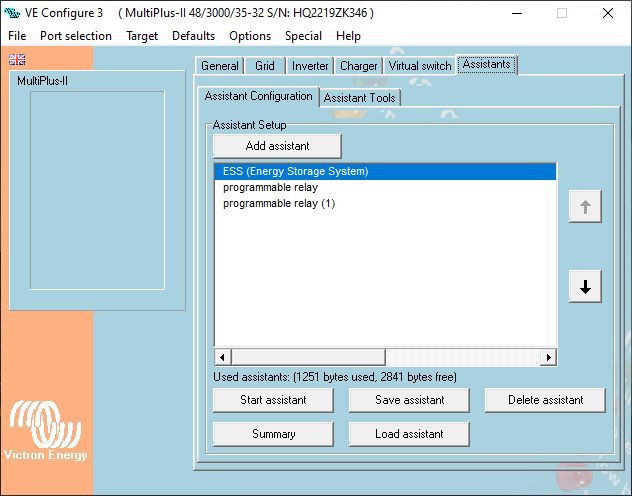
Close the window and select yes to saving your changes. Then head back to the page where you downloaded the config file and upload this new file.
Your relay is now programmed.
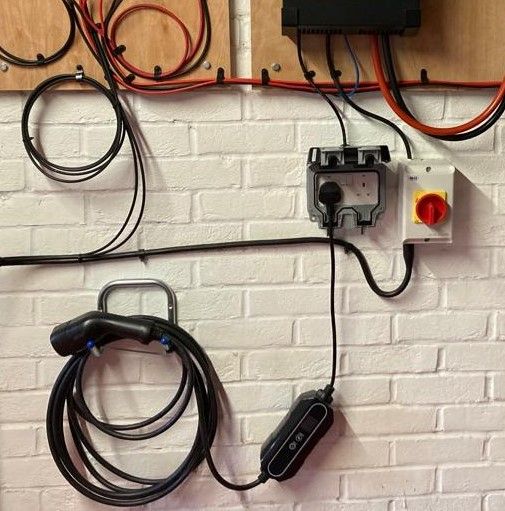
I then bought this 3 pin adjustable charger https://www.amazon.co.uk/S1mple-Portable-Charger-Controllable-Electric-Black/dp/B09Y5JY366?ref_=ast_sto_dp&th=1
And wired AC-OUT-2 into a RCBO equipped socket (these are ideal for use with 3 pin ev chargers) https://www.screwfix.com/p/masterplug-ip66-13a-1-gang-weatherproof-outdoor-unswitched-active-plug-socket-with-rcbo/889rg
I then set the charger to 10amps (this is 2300W) which means even if the multiplus warms up to 40C (which it will) I will only end up pulling 100W from the grid. Of course its going to be a tad more because the house is also using another 150W but 🤷♂️ ...
If you wanted to you could drop the charger to 8 amps. Its still enough to charge the car over a day, sometimes I may need a few hours the following day to top it off.
(note that you need power to the device to set the initial amperage up for the first time, if your programmed plug is offline you could just use another socket to pre-set the amperage; also note that you cannot adjust the amperage mid charge either).
Then plug the lead into your car.
As soon as the on relay is triggered your car will start charging. It will shut off when the SOC hits the off trigger - hopefully this is as the sun is setting and not because your panels are not able to cover the draw. For that reason alone its useful to know that your system can run a large load and not struggle to do so directly from solar!
(I simulated this load in advance with an electric heater running for x hours outdoors).
Its good to know that once your setup hits the "turn on" scenario that you are likely to be generating decent and stable power by this time otherwise you will be quickly heading to your "turn off" scenario rather than settling into a long 4-6+ hour charge routine.
From my initial month of testing I usually find that on a sunny day in May/June I can go from 0 to 70% charge in a day at 8amps. I then just leave the car plugged in and it automatically restarts and top's itself off the following day.
Testing in late June and early July found that I could go from 0-90% charge in a day at 8amps due to the longer charge frame.
Cost Breakdown:
| Item | Cost |
|---|---|
| RCBO protected socket | £63 |
| E-S1mple 3 pin adjustable charger | £160 |
| SMITH & LOCKE MID DUTY DOUBLE STORAGE HOOK | £5 |
| Type 2 EV Charger Plug Holder Wall Mount | £15 |
| Total £243 |
A semi smart charging solution for much much less than the cost of a wall mounted charger!
So far I've been using this for a whole month, not had to buy any petrol, and used my car as I normally would in this time. The i3 has limited battery range but its fine for 95% of journeys.
I just make sure that when I get home I plug the car in and then its ready for later.
And after all this my last electric bill was still just £30 for the month (remembering that half of this is standing charge with the other half being my base draw plus any peaks).
Still an absolute bargain!